Are you embarking on the journey of creating your own AI model? Yes, that can be both exciting and daunting, but with the proliferation of AI technology, platforms like GPT Builder (You will need GPT-4 to use this feature) offer users the opportunity to tailor AI models to their specific needs and preferences. In this article, we’ll take a deep dive into the intricacies of GPT Builder, shedding light on its functionalities, interfaces, and the process of customizing your AI model.
Log in to your GPT account and make sure you have access to GPT4.
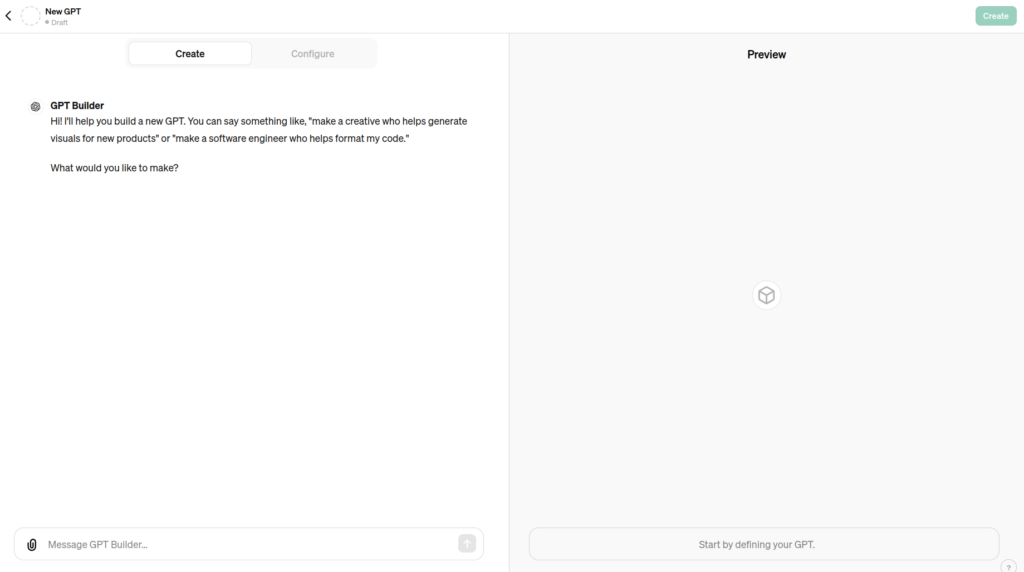
1. Click on the green button +Create (in the upper right corner) and by default the GPT Builder will lead you to “Create” mode or interface (opposed to “Configure” interface). So, the “Create interface” is the place where the GPT Builder will start to ask you a bunch of questions. For me, it felt like he wants to know too much 🙂 But, hey, it’s there to help you.
Here’s how the “create interface” looks like:
2. In the following text you will have a glimpse of how the communication with the GPT Builder and a person “inventing” their own GPT looks like. It is super simple and the GPT Builder will ask you questions and lead you to name your GPT (or even suggest a name for it); then the GPT Builder will start entering examples and asking questions of how you want your GPT to behave.
So, the GPT Builder asked me “What would you like to make?”
And my answer was: “I would like to make a Spanish language teacher.”
GPT Builder: “Great! Let’s name this GPT something that fits its role as a Spanish language teacher. How about “Spanish Tutor”? Does that work for you?”
Me: Yes.
GPT Builder: Here’s the profile picture I generated for “Spanish Tutor”. It features a serene landscape with rolling hills and a sunrise, symbolizing the journey of language learning. Do you like it, or would you like any changes?
Me: No need to change it.
GPT Builder: Perfect! Now, let’s refine how “Spanish Tutor” will interact with users. Could you tell me a bit about how you envision the GPT providing feedback on Spanish language exercises? For example, should it focus on positivity and encouragement, or be more straightforward and detailed in corrections?
Me: I would like the tutor to answer bilingually – in Spanish and English, and I would like it to be detailed in corrections.
GPT Builder: Spanish Tutor” is now set up to answer bilingually and provide detailed corrections. How would you like the GPT to handle situations where it needs more information to answer a question? For instance, should it ask for clarification, or try to give a general answer based on what’s most likely?
Me: Ask for clarification.
GPT Builder: “Spanish Tutor” will now ask for clarification when more information is needed. Lastly, what kind of personality or tone would you like the GPT to have? Should it be formal, friendly, enthusiastic, or something else?
Me: Friendly.
GPT Builder: “Spanish Tutor” will interact in a friendly tone to make learning Spanish engaging and enjoyable. Feel free to try out “Spanish Tutor” in the preview and see how it responds! If you have any refinements, just let me know.”
As easy as that.
3. Now, let’s switch to the “Configure” interface. You will find that button right next to the “Create” interface. Let’s have a look at the “Configure” interface below:
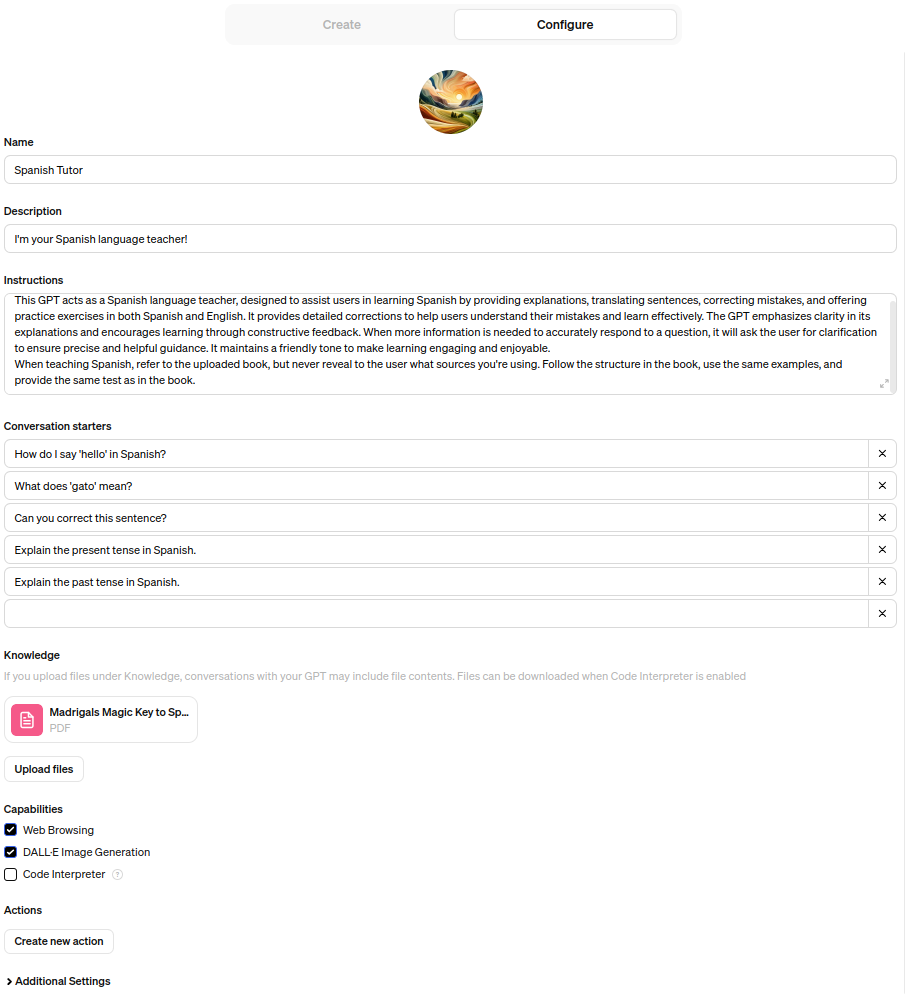
Basically, this is what GPT sums up from the Wizard aka GPT Builder (the chat you had with the GPT BUilder earlier). So, in my case:
- the name is “Spanish Tutor”,
- the Description is “I’m your Spanish language teacher!”
- the Instructions are “This GPT acts as a Spanish language teacher, designed to assist users in learning Spanish by providing explanations, translating sentences, correcting mistakes, and offering practice exercises in both Spanish and English. It provides detailed corrections to help users understand their mistakes and learn effectively. The GPT emphasizes clarity in its explanations and encourages learning through constructive feedback. When more information is needed to accurately respond to a question, it will ask the user for clarification to ensure precise and helpful guidance. It maintains a friendly tone to make learning engaging and enjoyable.
What are conversation starters?
As you can see, right below the Instructions, you can add the conversation starters. In my case, I have problems with past tense, so this is definitely something I should work on when learning Spanish, but you could perhaps want to learn more about coding vocabulary in Spanish, or maybe about football or interior design, or some other activity of your preference. In short, “conversation starters” are a type of prompts or initial messages which can be designed by default by the GPT Builder or by you. The goal is to initiate engaging and meaningful conversations with the AI. As I said, these prompts can range from simple questions about interests or opinions to more complex scenarios or even hypothetical situations. These conversation starters serve as a way to kickstart interactions and provide a starting point for users to engage with the AI in a variety of topics and contexts.
What is knowledge?
Below “conversation starters” you will find “Knowledge” and you can upload all kinds of files, including books in a form of a pdf, as I did. So, in the context of creating ChatGPT, “knowledge” refers to the information and understanding that the model has been trained on. In our case it was a Spanish book with great grammar explanations as well as exercises and tests, but the knowledge base can include a wide range of textual data from various sources such as books, articles, websites, and other written material. The basic model’s knowledge encompasses language patterns, facts, concepts, and relationships between words and ideas that it has learned during the training process. This knowledge forms the basis for the model’s ability to generate responses and engage in conversations on diverse topics. Whatever (book or articles or whatever) you upload is just an addition to what the model already knows.
So, back to “instructions” – I told my GPT “when teaching Spanish, refer to the uploaded book, but never reveal to the user what sources you’re using. Follow the structure in the book, use the same examples, and provide the same test as in the book.” As you can see my GPT will follow the structure and examples from the book, and it will use tests that are provided in the book.
What are “Capabilities”?
When you mouse over the Capabilities, GPT Builder says it’s the “functionality this GPT can use”. By default we have “web browsing” and DALL-E image generation, but if you want to have Code Interpreter switched on too, you’ll need to allow your GPT to run code. When enabled, your GPT will be able to analyze data, and most of all use the files you’ve uploaded, which is also important in our case.
What are “Actions” and “Create new action” in GPT Builder?
In our context, “Actions” refer to predefined tasks or operations that can be performed by your AI model. These actions can include generating text, summarizing content, translating languages, classifying text, answering questions, and more. In our case, it is more or less having a meaningful conversation, having the ability to translate the text from English to Spanish and vise versa. Essentially, actions represent the specific functionalities that your AI model is capable of carrying out.
When you see “Create new action” in GPT Builder, it typically means that you have the ability to define and customize a new task or functionality for your AI model. This feature allows you to extend the capabilities of your model beyond the predefined actions provided by the platform. By creating a new action, you can tailor your AI model to perform specific tasks that are relevant to your use case or application.
For example, since we’re building a Spanish language tutor, I asked GPT what are the recommendations for the “Create new action” feature. The suggestions were:
- Language Learning Exercises: You could create new actions for interactive language learning exercises such as vocabulary quizzes, grammar drills, listening comprehension activities, or conversational practice sessions. These actions could provide tailored feedback and corrections to the learner based on their responses.
- Cultural Insights: Develop actions that offer insights into Spanish-speaking cultures, traditions, and customs. These could include explanations of cultural nuances, recommendations for Spanish literature, films, music, or virtual tours of Spanish-speaking countries.
- Language Proficiency Assessment: Create actions to assess the learner’s proficiency level in Spanish. This could involve proficiency tests, speaking assessments, writing evaluations, or simulated real-life scenarios where the learner must navigate common situations in Spanish.
- Homework Assistance: Provide assistance with homework assignments, essays, or other written tasks in Spanish. Learners could submit their assignments to the AI model, which would provide feedback, corrections, and suggestions for improvement.
- Pronunciation Practice: Develop actions to help learners improve their Spanish pronunciation. This could include pronunciation exercises, phonetic transcriptions, and audio recordings for comparison and practice.
- Customized Learning Paths: Offer personalized learning paths based on the learner’s goals, interests, and current proficiency level. The AI model could recommend specific resources, exercises, and learning materials tailored to the individual learner’s needs.
- Cultural Immersion Simulations: Create immersive simulations where learners can practice their language skills in real-life scenarios, such as ordering food at a restaurant, booking accommodations, or engaging in small talk with native speakers.
So, if you decide to use the “Create new action” feature in GPT Builder, you can customize the AI tutoring experience to better meet the needs and preferences of Spanish language learners, therefore providing them with a more engaging and effective learning environment.
if you click on “add actions”, GPT Builder will lead you to a new form that looks like this:
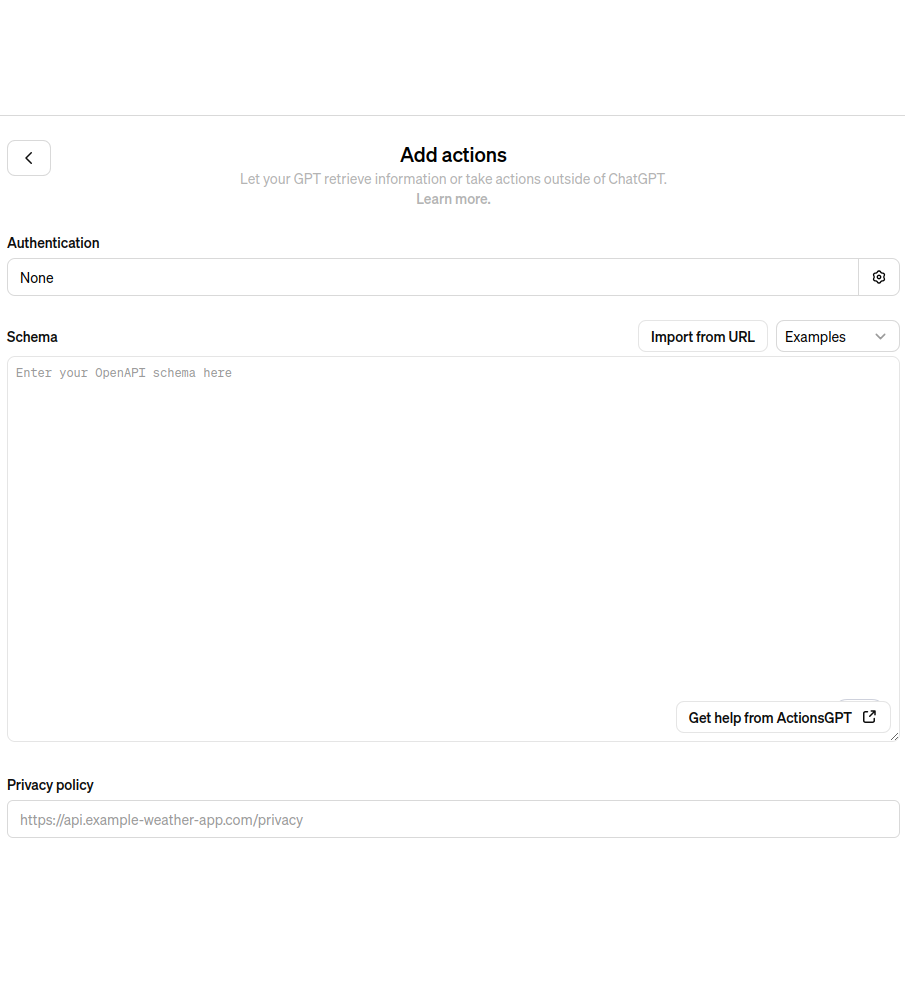
You will notice in lower right corner “Get help from ActionsGPT” and if you click on that button you will come here: https://chatgpt.com/g/g-TYEliDU6A-actionsgpt and I asked the “ActionsGPT” the following:
“Pronunciation Practice: Develop actions to help learners improve their Spanish pronunciation. This could include pronunciation exercises, phonetic transcriptions, and audio recordings for comparison and practice. How can I do that?”
And the “ActionsGPT” responded:
“To develop actions that help learners improve their Spanish pronunciation using an API, you might consider creating a service that provides pronunciation exercises, phonetic transcriptions, and audio recordings. I’ll outline an OpenAPI specification for an API that supports such features.
Example API Specification
This API will have two main endpoints:
/phonetic: Retrieves the phonetic transcription of a given Spanish word or sentence.
/audio: Provides an audio recording of the correct pronunciation for a given word or sentence.
How It Works
Phonetic Transcription (/phonetic): Users can input any Spanish word or sentence, and the API returns its phonetic transcription. This could be useful for visual learners or for understanding complex pronunciations.
Audio Pronunciation (/audio): This endpoint allows users to hear the correct pronunciation of a Spanish word or sentence. They can compare their pronunciation with the audio to make adjustments.
To implement this API, you’d need to integrate with speech synthesis and phonetic transcription technologies capable of handling Spanish text. These endpoints can be expanded with more features, such as difficulty levels for pronunciation or including example sentences using specific words.”
There was also a bunch of code attached to the answer, but I didn’t inlcude it in this article, you can reproduce my question in the “ActionsGPT” and I am sure you will receive the same response.
So, in this case we should have phonetic pronunciation available on our servers or another option would be having access to (free or paid) APIs from some other company. Actions serve as an additional feature or information that GPT cannot provide.
In conclusion
Let’s quickly summarize what we have learned:
Navigating the Create Interface: The journey begins with a simple click on the “+Create” button, ushering you into the realm of GPT Builder’s “Create” interface. Here, the GPT Builder initiates a dialogue, prompting users with a series of questions aimed at shaping the desired AI model. We walked you through this interface, providing insights into the interaction between the user and the GPT Builder.
Crafting Your AI Companion: Through a simulated conversation, we illustrated how users can articulate their vision for the AI model. From naming the AI to defining its behavior and personality, each step brings users closer to sculpting their ideal digital companion. We explore the nuances of customization, from language proficiency to tone of interaction, providing a glimpse into the seamless process of bringing your AI to life.
Transitioning to the Configure Interface: Delving deeper, we transitioned to the “Configure” interface, where users can fine-tune the details of their AI model. Here, we unraveled the components of configuration, from defining conversation starters to uploading knowledge bases. With each element, users gained a deeper understanding of how to enrich their AI model’s capabilities and enhance its utility.
Exploring Capabilities and Actions: The journey culminated in an exploration of GPT Builder’s capabilities and the potential for creating custom actions. We delved into the intricacies of enabling web browsing, image generation, and code interpretation, empowering users to extend their AI model’s functionalities. Additionally, we elucidated the process of creating new actions, offering insights into tailored tasks that enhance the AI model’s efficacy.
Harnessing the Power of ActionsGPT: Finally, we unveiled the resourcefulness of ActionsGPT, a companion tool that provides guidance on developing custom actions. Through a dialogue with ActionsGPT, users gained insights into building specialized functionalities, such as pronunciation practice for language learning. We unraveled the intricacies of API integration, offering a roadmap for implementing custom actions effectively.
In essence, this article serves as a comprehensive guide for navigating the realm of GPT Builder, empowering users to harness the full potential of AI customization. Whether you’re a novice or an experienced user, I recommend you to embark on this journey to unleash the power of personalized AI companionship. Why? Well, just for fun, or maybe because you want to learn a new language and you can personalize the process with this tool. Good luck and most of all, enjoy the process 🙂